Silent Shark Systems
Every instrument on the boat exists to answer one question: where will the target be when your torpedo arrives?
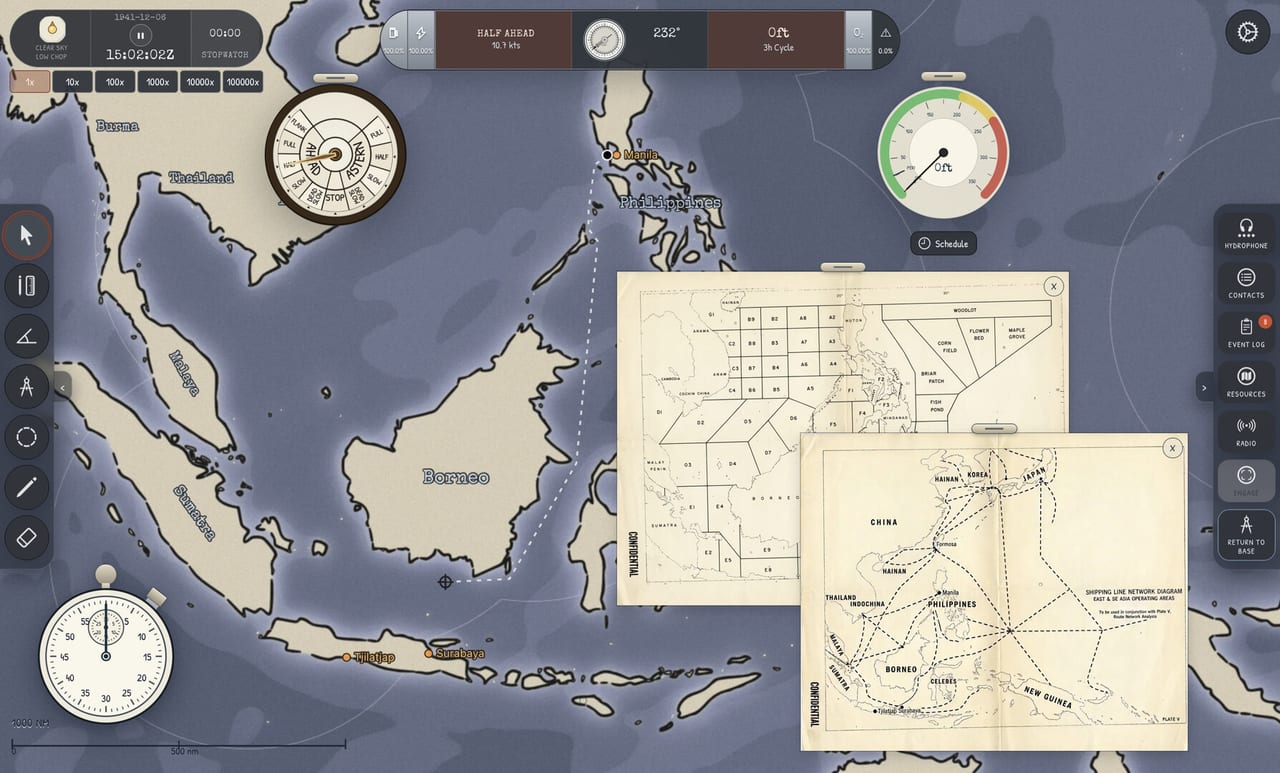
The Systems Hub documents how Silent Shark’s WWII Pacific submarine instruments work together. John Goering’s design is deliberately map-first: the tactical chart is your primary navigation surface, while the hydrophone, periscope, stadimeter, and Torpedo Data Computer (TDC) supply the contact data that turns a bearing line into a hit.
Unlike arcade sub sims, you do not chase targets in a 3D ocean sandbox. You hunt with imperfect information, refine estimates over time, and commit when your solution is good enough — knowing that destroyer escorts will exploit any sloppy depth change or long periscope exposure.
Core attack stations
Read these pages in any order, but the natural data flow runs hydrophone → chart → periscope → stadimeter → TDC:
- TDC and Position Keeper — Enter AoB, target speed, bearing, and range; manage gyro angle, spread, and tube flooding before firing.
- Hydrophone Tracking — Passive bearings, RPM pitch cues, and telling merchants apart from escorts by sound.
- Periscope Observation — Ship identification, brief exposure doctrine, and 1.5× / 6× zoom trade-offs.
- Map Tools — Compass, ruler, timestamped points, and angle helpers for intercept geometry on the chart.
- Thermal Diving and Bathythermograph — Layer depth by time of day and region; when to hide above or below a temperature boundary.
- Binoculars, TBT, and AoB Training — Visual bearings and silhouette AoB drills from the June 30 radio-room update.
- Ship Identification — Class silhouettes, mast height for stadimeter, and short-scope ID doctrine.
Each system page links back to practical guides such as Four Bearings and Stadimeter Range where walkthrough context helps more than raw instrument description.
How systems interact during a contact
A typical merchant intercept begins on the hydrophone with a faint bearing. You plot that line on the chart and start a time-series — often using the four bearings method from the Guides Hub — to estimate course and speed. When geometry looks favorable, you close to periscope depth, raise the scope briefly for class identification, and snap a stadimeter cut if mast height is known.
Those values feed the TDC Position Keeper, which continuously updates the firing solution as your submarine moves. Tube prep — flooding, gyro setting, spread selection — happens on the firing box modeled after period controls. After launch, you care about thermal layers and escort sonar: the same bathythermograph reading that helped you hide may block your escape if you choose the wrong depth band.
Demo and full release parity
The free demo ships with the core stations listed above and is playable in browser or on Steam today. The full game, live since August 12, 2026, adds campaign pacing, additional submarine classes, and richer scenario variety, but the underlying TDC and sensor model remains consistent. See Demo vs Full for a feature checklist.
Related hubs
- Guides Hub — Step-by-step tutorials from first intercept to convoy egress.
- Controls Hub — Hotkeys and station focus that keep your hands on the chart during time compression.
- Tools Hub — Attack checklist summarizing every system tick before you flood tubes.
- Campaign Hub — How patrol orders and radio intel decide which systems matter on a given sortie.
Quick reference table
| System | Primary output | Common mistake |
|---|---|---|
| Hydrophone | Bearing + class hint | Treating one bearing as gospel |
| Map tools | Intercept track | Forgetting timestamped points |
| Periscope | Ship type + visual AoB | Keeping scope up too long |
| Stadimeter | Range input | Wrong mast height for class |
| TDC | Gyro + firing time | Not updating speed after turn |
| Thermal layer | Concealment depth | Diving through layer noisily |
Use this hub as your instrument encyclopedia while preparing for the 1.0 Steam launch. Patch-level changes are tracked on Launch Notes.
How to study systems without drowning
Read one instrument page, then immediately play a demo encounter that forces that instrument. After TDC, run a single-ship attack. After hydrophone, run a long-range contact scenario. After periscope and stadimeter habits, practice short exposures. After thermal diving, practice egress without peeking. The map tools page should stay open in a second browser tab until chart marks feel automatic.
Systems versus guides
Guides teach sequences. Systems teach what the dials mean when something goes wrong. When a torpedo misses, open the matching system page and ask which input lied. That diagnostic loop is how Silent Shark skill actually compounds in the live Pacific campaign.
Recommended systems reading order
Then return to the Guides Hub for video-backed practice.
Frequently Asked Questions
Quick answers to the most common Silent Shark questions.
What is the most important Silent Shark system to learn first?
The chart and hydrophone loop. You cannot feed the TDC meaningful data until you can plot bearings and estimate course and speed — start with [Map Tools](/systems/map-tools/) and [Hydrophone Tracking](/systems/hydrophone/).
Does the demo include the full TDC?
Yes. The demo includes the Torpedo Data Computer, Position Keeper, periscope, hydrophone, stadimeter, and torpedo tube controls used in the full game’s attack workflow.
Are Silent Shark systems realistic?
They are period-inspired rather than a training simulator, but AoB, range estimation, gyro angle, spread, thermal layers, and escort sonar behavior are modeled seriously enough that real sub tactics translate.