Silent Shark Station Layout and Workflow
Detect → plot → identify → solve → fire → evade — the station order pros memorize until it is reflex.
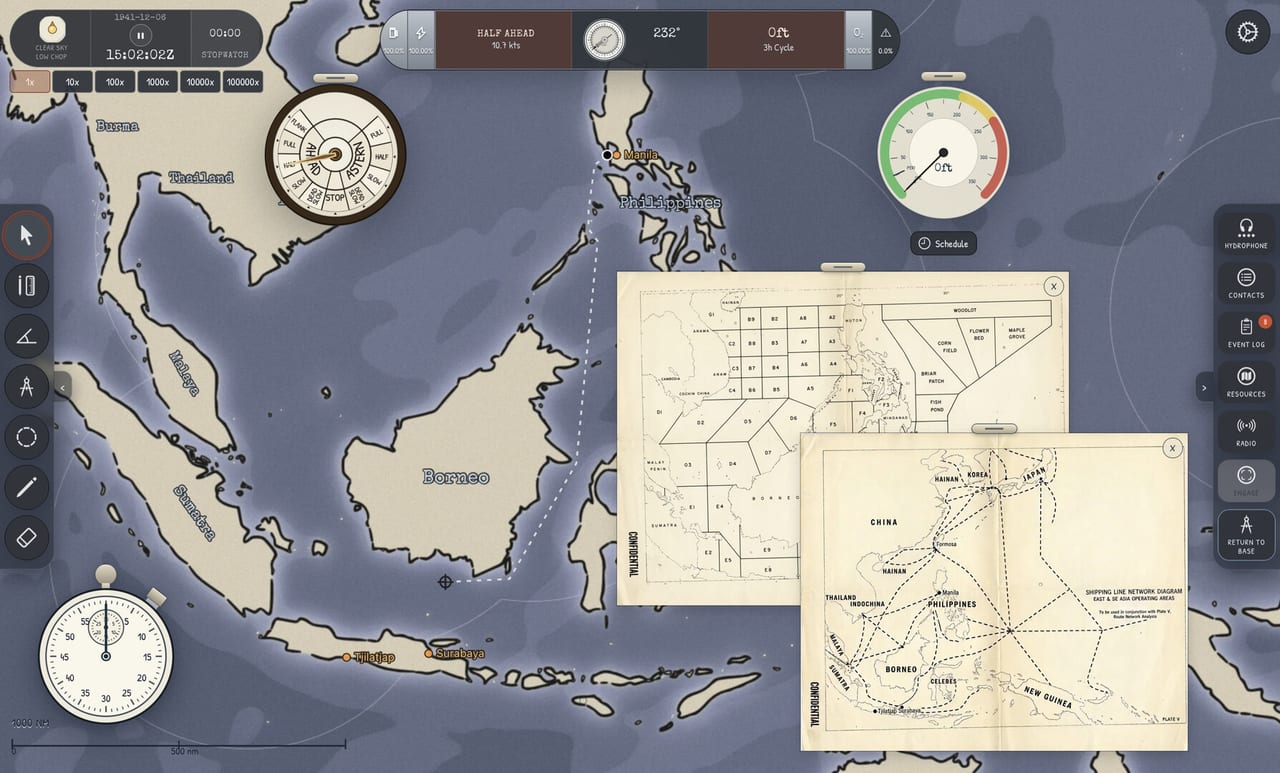
Silent Shark gameplay is station hopping with purpose. Each WWII-inspired instrument answers one question in the attack chain. This page defines the workflow order that ties Controls bindings to Systems behavior and Guides tactics.
Phase map
| Phase | Station | Output |
|---|---|---|
| Search | Hydrophone | Bearing + class hint |
| Plot | Chart / map tools | Course, speed, intercept |
| Approach | Telegraph + depth | Geometry to commit range |
| ID | Periscope | Class, AoB |
| Range | Stadimeter (periscope UI) | TDC range input |
| Solve | TDC + Position Keeper | Gyro, readiness |
| Fire | Torpedo tubes + firing box | Weapon away |
| Evasion | Depth + telegraph + hydrophone | Survival |
Search and plot
Start on hydrophone at listen speed. On contact, switch to chart, mark timestamped bearing, return to hydrophone for bearings two through four — Four Bearings. Avoid staying on hydrophone so long you forget to update own-ship track after turns.
Approach
Use engine telegraph and depth together. Descend to periscope depth smoothly as intercept closes. Chart stays one keypress away for geometry checks.
Identify and range
Periscope up briefly: class, AoB, stadimeter cut — Stadimeter Range. Lower scope before TDC if solution needs thought; raised scope during long TDC fiddling invites escort vision.
Solve and fire
TDC first for solution stability; tubes only when committing. Flooding is audible — Attack Checklist places flood after solution lock.
Evasion
Depth changes coordinated with telegraph; hydrophone monitors escort screws throughout — Evading Destroyers. Chart pre-planned egress leg prevents panic turns.
Switching discipline
- One question per station visit — do not “live” anywhere.
- Return to chart after every hydrophone or periscope look.
- Pause if switching overwhelms — better than firing on chaos.
Demo tutorial alignment
Basic Tutorial walks this order explicitly. Advanced tutorials reorder slightly for teaching stress — your live sorties should still follow search → fire → evade.
Campaign additions
Full release adds radio and campaign map routing stations conceptually on the chart layer — Patrol Radio — without replacing instrument stations.
Related
Loop timing
Beginners may pause while learning; veterans run search through fire under 1× without menu pause. Practice demo Encounter 1 until one complete loop needs no freeze.
Station tips
Hydrophone: log bearing before switching away. Chart: update every visit. Periscope: stable depth before raise. TDC: batch entries from one look. Tubes: flood only after egress line exists on chart.
Multi-monitor
Chart on second display reduces toggle friction during bearing legs — optional but popular among demo veterans.
Error recovery between stations
If you reach TDC with inconsistent data, walk backward: return to chart, verify bearings, new periscope look, then TDC — never fire hoping math fixes itself.
Night and rain station order
Same loop, tighter time on periscope. You may visit hydrophone once more before commit for bearing refresh when visibility shortens ID window.
Campaign radio station
Radio messages arrive on chart layer in full game — read, plot area, then resume hydrophone search. Radio is not separate mini-game — see Patrol Radio.
Summary
The station loop is the game: detect on hydrophone, decide on chart, confirm on periscope, commit on TDC, survive on depth and hydrophone again. Attack Checklist mirrors this order until the loop becomes reflex.
Practice sortie
Run one demo generator convoy focusing only on station order — ignore perfection — until you can narrate each switch aloud without hesitation. Then re-enable quality standards from Four Bearings.
Station order under fire
When a contact appears, resist the urge to open the periscope first. Chart and hydrophone first. Depth second if you are dangerously shallow for aircraft or visual detection. Periscope third. TDC fourth. Tubes last. That order is the difference between a planned attack and a panicked one.
Station clutter management
Close stations you are not using. Silent Shark’s panels are dense; visual clutter causes missed Position Keeper warnings. The left-side tutorial panel layout in recent demo builds exists to keep instruments readable — mirror that clarity in your own layout habits.
Switching speed
Use bindings from keyboard and mouse until switches are instant. Timed attacks fail when players browse menus. Practice switching chart → TDC → tubes in under two seconds in a calm scenario.
Linking stations to wiki systems
Each station has a systems page: hydrophone, periscope, TDC, map tools, thermal diving. When a station confuses you, open the matching system article between encounters, not during a destroyer hunt.
Frequently Asked Questions
Quick answers to the most common Silent Shark questions.
Which station should I use first when I hear a contact?
Hydrophone for the bearing, then immediately chart to plot the line with a timestamp. Repeat for subsequent bearings before intercept planning.
Should I stay on the TDC station until I fire?
Monitor TDC near fire, but visit chart and hydrophone as needed to refresh inputs. Do not ignore stale range while staring at gyro angle.
Does station layout change between demo and full game?
Core stations remain the same. UI spacing improved in demo patches to keep TDC visible alongside tutorial text.