Getting Started in Silent Shark
Your first plotted intercept — from hydrophone whisper to torpedo away, using the same loop the full game will expect.
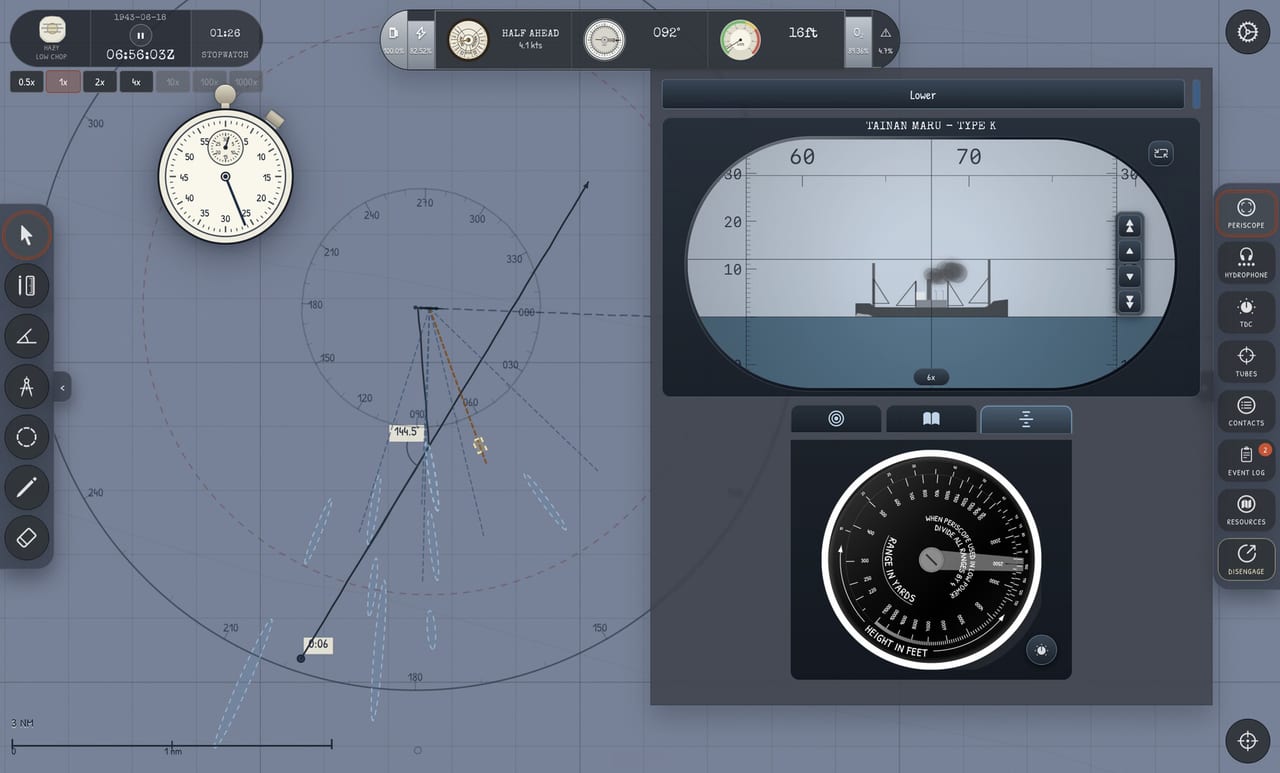
This Getting Started guide walks through Silent Shark’s core loop as taught in the in-game Basic Tutorial and the free demo on Steam and in browser. Silent Shark 1.0 launched on August 12, 2026; you can still learn every foundational skill today: chart navigation, hydrophone contacts, depth and speed orders, periscope identification, and a first TDC-assisted torpedo attack.
Silent Shark is a single-player, map-based WWII Pacific submarine simulator. You are not driving a submarine through a 3D ocean; you are issuing orders on historical-inspired instruments while the tactical chart shows geometry. That distinction matters because your first hour is about procedure, not reflexes.
Before you sortie
Install the Silent Shark Demo or open the browser demo from the official site. From the main menu, launch Basic Tutorial — it aligns with the video walkthrough embedded on this page. Skim Keyboard and Mouse so you know how to pause, switch stations, and adjust time compression. The tutorial recently disabled 1000× compression because it caused players to blow past intercept points; stay at modest compression until bearings make sense.
Wishlist the full game if you plan to play the Pacific campaign at launch. Demo progress teaches mechanics; career progression waits for 1.0. See Demo vs Full for scope.
Phase 1 — Chart and own-ship control
The tutorial introduces the tactical chart first. Learn to pan and zoom, place timestamped points, and read your own track. The engine telegraph orders ahead, stop, and reverse combinations; pair telegraph changes with depth orders on the depth meter. Silent Shark models inertia — slamming flank while flooding a tube shakes the boat and can alert nearby escorts in later scenarios.
Practice switching between chart and depth station until you can hold periscope depth without oscillating through the layer. You will live at periscope depth during attacks; getting there smoothly is a skill, not a given.
Phase 2 — First hydrophone contact
When the hydrophone operator reports a contact, open the hydrophone station and note the bearing relative to your bow. Return to the chart and plot a bearing line from your position. One line is not enough for speed, but it tells you which way to turn for a better geometry.
This is the seed of the Four Bearings Method. In Basic Tutorial the target behavior is forgiving — follow the on-screen prompts — but mentally label each step: detect, plot, refine, intercept.
Phase 3 — Closing and periscope ID
As you close, the tutorial guides you to periscope depth and a short scope raise. Identify the merchant class; note mast height hints for later stadimeter work in Stadimeter Range. Keep exposures brief — the scope is a magnet for escorts in convoy scenarios.
Verify target angle-on-bow (AoB) visually: is the ship crossing your bow, moving away, or presenting a fat broadside? AoB feeds the TDC later.
Phase 4 — TDC setup and first torpedo
Open the TDC station. Enter target speed, bearing, and estimated range from tutorial prompts. The Position Keeper tracks solution quality as both boats move. When the solution stabilizes, move to torpedo tubes: select a tube, flood, set gyro angle as indicated, and fire when the TDC marks ready.
Misses in tutorial often trace to stale range or speed — not bad luck. If the torpedo runs wide, replay mentally: did you update speed after a turn? Was range still from an old stadimeter cut?
Phase 5 — Withdraw
Even tutorial merchants may have escorts nearby in advanced modes. After firing, lower the scope, go deep or silent, and open distance off the contact bearing. Full egress doctrine is in Evading Destroyers; for now, follow tutorial egress waypoints on the chart.
What to learn next
| Skill | Guide |
|---|---|
| Stable course/speed from bearings | Four Bearings |
| TDC depth | How to Use the TDC |
| Range without guessing | Stadimeter Range |
| Full sortie flow | First Patrol |
Cross-read Systems Hub pages for instrument detail: Hydrophone, Periscope, TDC, and Map Tools.
Common beginner mistakes
- Chasing with max compression and missing bearing updates.
- Flooding tubes before the solution is stable — noisy and wasteful.
- Living on the periscope instead of snapping looks.
- Ignoring depth layer hints that appear later in Thermal Diving.
Silent Shark rewards calm repetition. Run Basic Tutorial once with this guide open, then repeat standalone Encounter 1 until you can execute without prompts. That baseline makes the August 2026 campaign approachable on day one.
Frequently Asked Questions
Quick answers to the most common Silent Shark questions.
Can I complete Getting Started in the browser demo?
Yes. The browser demo includes the Basic Tutorial and the same chart, hydrophone, TDC, and torpedo workflow described here.
Do I need the full game to practice the tutorial?
No. The demo is free. The full release adds the Pacific campaign and boat progression, not a different tutorial engine.
What should I learn after the Basic Tutorial?
Move to [Four Bearings](/guides/four-bearings/) and [How to Use the TDC](/guides/how-to-use-tdc/), then try standalone convoy encounters in the full campaign.