Silent Shark Ship Identification
Class the contact fast, grab mast height and AoB, then drop the scope before the screen notices you.
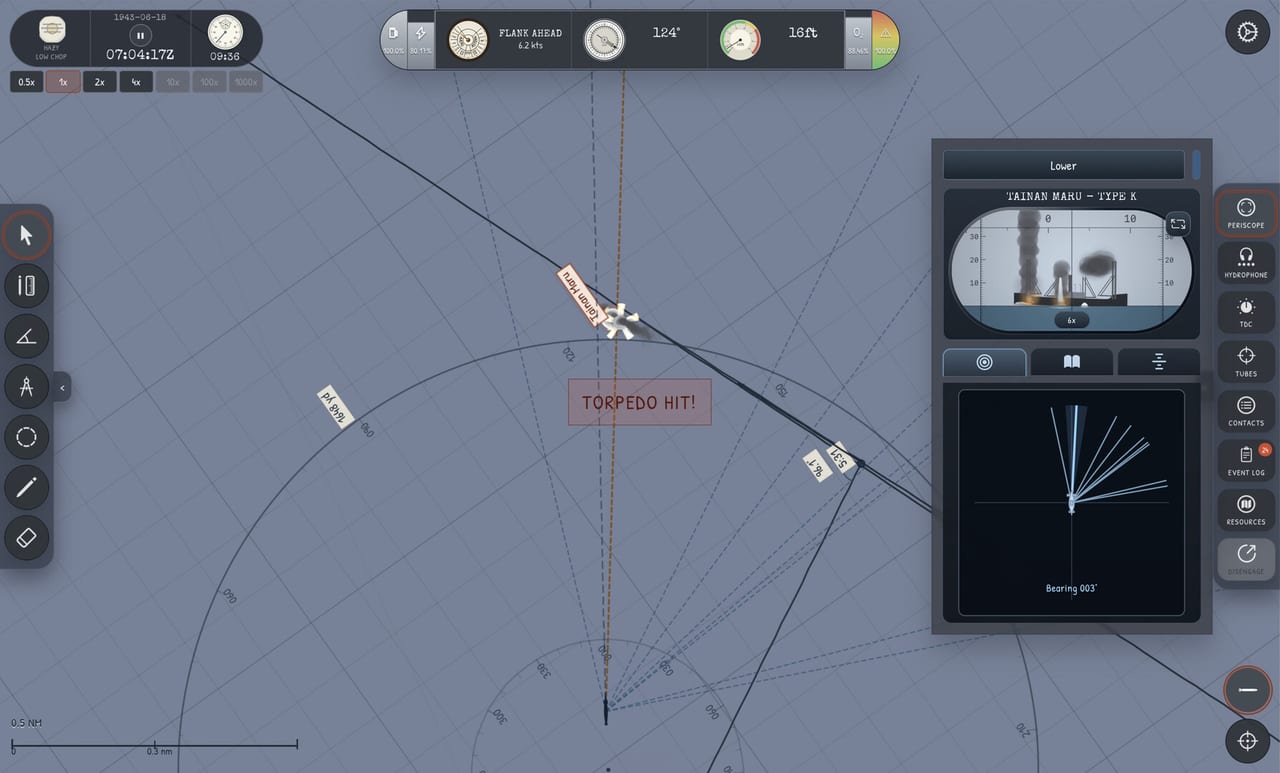
Ship identification is the bridge between a hydrophone whisper and a honest TDC solution. Silent Shark expects you to classify contacts through the periscope (and binoculars when surfaced), pull mast height for the stadimeter, and read angle-on-bow visually — then stop looking. This systems page explains the recognition loop used in the free Demo and the full Pacific campaign now live on Steam.
Identification is single-player pressure: no XO calls the class for you. Wrong mast height becomes wrong range; wrong class becomes a wasted salvo on a low-value hull while escorts close.
Why ID comes before the TDC
The TDC will happily compute garbage. It needs:
- Target type / class — for mast height tables and value judgment.
- Range — usually via Stadimeter Range after mast height is known.
- AoB and speed — visual AoB plus Four Bearings course/speed.
Skip ID and you are inventing numbers. The mid-article Demo footage shows how observation stations feed that chain without turning the fight into a sightseeing tour.
Recognition stations
| Station | Best use | Risk |
|---|---|---|
| Hydrophone | Merchant vs escort pitch cues | No mast height |
| Binoculars / TBT | Surface visual bearings and AoB drills | Aircraft and lookouts |
| Periscope 1.5× | Broad silhouette class | Longer exposure temptation |
| Periscope 6× | Mast, funnel, and fine AoB | Narrow field, tunnel vision |
Read Binoculars, TBT, and AoB Training and Periscope Observation alongside this page.
Merchant versus escort at a glance
Train your eye (and ear) on contrasts:
- Merchants: longer hulls, taller working masts relative to combat ships, slower RPM character on hydrophone.
- Escorts / destroyers: sharper sound, shorter aggressive silhouette, higher speed when they sprint a bearing.
- Mixed columns: ID the screen first even if you intend to shoot a freighter — see Convoy Attack Doctrine.
If you cannot tell escort from merchant before you raise the scope, stay on hydrophone longer. A wrong “merchant” call that is actually an escort becomes an evasion fight you started yourself.
Mast height and the stadimeter contract
Silent Shark’s stadimeter workflow is historically flavored: identify the ship to obtain mast height, measure the angle to the mast top, and let the instrument derive range. Failure modes:
- Selecting the wrong class → wrong height → optimistic range → early gyro / short fish.
- Measuring in haze or roll without a clean mast tip → noisy range.
- Reusing an old cut after the target zigzags → Position Keeper drift.
Procedure: ID → height → one clean cut → enter TDC → lower scope → update only when geometry changes.
Visual angle-on-bow
AoB is the angle between the target’s course and your line of sight. Broadside is not always “easy”; it is simply a clear picture. Practice with the recognition trainer content highlighted in June 2026 radio-room notes, then apply Angle on Bow Explained until Basic and Advanced tutorial language stop contradicting each other in your head.
Quick visual checklist:
- Bow-on / stern-on → small projected length, hard mast work.
- Fine AoB → target crossing; good for intercept planning.
- Near-beam → fat silhouette; classic firing geometry if escorts allow.
Exposure doctrine (the real skill)
Identification fails most often because skippers stay up. Treat every raise as a shopping list:
- Class / silhouette.
- Mast tip for stadimeter.
- AoB estimate.
- Scope down.
If you did not get all three, schedule a second short raise later — do not linger to “finish looking.” Escorts and aircraft punish lingering more than they punish a second peek.
Campaign and weather modifiers
- Night / rain / haze: silhouettes soften; rely more on hydrophone and chart geometry.
- Late-war denser air: surface binocular ID is expensive — Diving Cycles.
- Historical ship persistence: sunk named ships stay sunk — do not expect the same freighter twice in a patrol.
Drill plan
Use the Scenario Generator:
| Drill | Setup | Success |
|---|---|---|
| Class only | Daylight single ship | Correct class in one raise |
| Mast + range | Clear air | Stadimeter cut within tutorial tolerance |
| AoB under stress | Escort nearby | AoB logged without second raise |
| Convoy ID | Small column | Escort vs merchant called before fire |
Log mistakes. Most “TDC is broken” complaints are ID or stale range.
Links into the attack loop
After a clean ID:
- Plot on Map Tools.
- Confirm course/speed with bearings.
- Enter TDC values.
- Execute Attack Checklist.
- If screened, follow Convoy Attack egress.
Common ID errors
- Naming a ship from memory of a previous patrol without a fresh look.
- Using 6× zoom for the entire approach.
- Ignoring hydrophone pitch that already said “escort.”
- Entering mast height for the wrong class after a rushed silhouette call.
Related hubs
Ship identification is not trivia — it is fire control. Treat every silhouette as a number that will either hit steel or wake a destroyer.
Frequently Asked Questions
Quick answers to the most common Silent Shark questions.
Do I need perfect ship names to fire?
You need a reliable class for mast height and value judgment. Exact historical names help campaign flavor, but wrong mast height hurts more than a slightly generic class call.
Can I identify ships from the hydrophone alone?
Hydrophone can separate many merchants from escorts by pitch and RPM character, but mast height for stadimeter still needs a visual ID at the periscope or binoculars.
Where should I practice identification?
Use Demo tutorials, the AoB recognition trainer content, and scenario generator daylight singles before you ID under a full convoy screen.