Silent Shark Periscope Observation
Snap looks, class identification, and angle-on-bow — the periscope is a scalpel, not a window you live in.
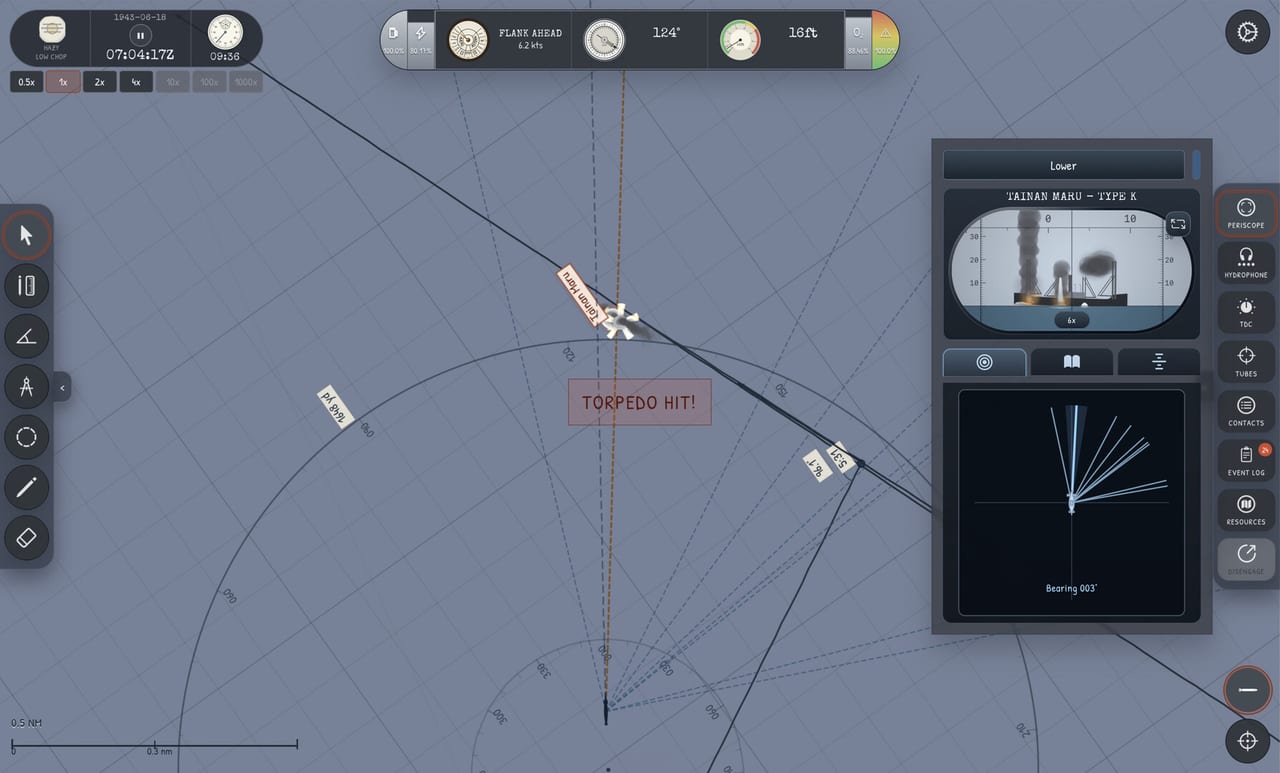
Silent Shark’s periscope offers stylized 3D views of contacts within visibility range at 1.5× and 6× zoom. It bridges chart plotting and firing commit: you confirm class, estimate angle-on-bow (AoB), align the stadimeter, and leave before escorts draw a bead on your feather. The periscope is not the game’s center — the chart is — but it is the moment imperfect math meets reality.
This is not a free-roaming camera. Exposure time matters for detection risk — especially in convoy scenarios and night engagements where visibility rules punish habituated scope time.
Design philosophy
John Goering models brief exposure doctrine rather than submarine-themed sightseeing. You snap a look, extract data, lower the scope, and return to the chart or TDC. Players who treat the periscope like a sniper scope often win screenshots and lose boats.
Zoom selection
- 1.5× — situational awareness, multiple ships in frame, initial class guess, convoy formation checks.
- 6× — mast detail for stadimeter, fine AoB read, confirm superstructure features.
Switch zoom between short raises rather than hunting at 6× for minutes. A workable pattern: 1.5× acquisition sweep, lower, 6× measurement raise under five seconds if class known.
Identification workflow
- Raise scope at periscope depth with boat steady on ordered depth.
- Pan to contact bearing from hydrophone/chart — never search blindly across the horizon.
- Classify merchant type for mast height lookup in stadimeter — see Stadimeter Range.
- Note AoB for TDC entry; classify as port/starboard bow, beam, or quarter.
- Align stadimeter graticule if taking range on same look.
- Lower scope before updating TDC if solution work takes more than a few seconds.
Repeat only if ID failed — do not extend exposure to compensate for poor planning on bearings. Failed ID means bad four bearings or wrong intercept — fix upstream.
Ship recognition priorities
Learn demo merchants in clear weather first. Superstructure height, funnel count, and hull length cues map to mast height tables used by the stadimeter. Mis-identification sends torpedoes long or short even when AoB felt perfect.
Escorts may appear in frame edge during convoy looks — note their bearing relative to intended victim before lowering scope. That bearing feeds immediate egress planning on Map Tools.
Visibility modifiers
Sea state, weather, and time of day shrink reliable ID range. Rain and night push you closer to escorts for the same stadimeter quality — adjust attack planning on the chart before descending. Heavy seas add roll — wait for steadier moments before 6× mast alignment.
Scenario generator toggles exist precisely to stress this pipeline. Practice clear day first; add rain only after three clean identifications in a row.
Relationship to TDC
Periscope observations should snapshot into TDC fields as a set: range + AoB + class confirmation. Updating range without AoB (or vice versa) causes consistent miss patterns detailed in How to Use the TDC.
Position Keeper drift after a good look usually means own-ship motion changed speed or target turned — not that the scope lied.
Exposure risk and escorts
Visual detection is probabilistic but biased toward players who hover. Silent Shark escorts model search responses to torpedo wakes, flooding noise, and visual sightings. Long scope time near convoy cores is volunteering for sprint behavior covered in Evade Destroyers.
Post-attack discipline
Every second on the scope after firing is a second you are not deep and silent. Post-attack, periscope should stay down until evasion completes. Curiosity kills virtual submarines as reliably as bad TDC math.
Demo vs full game
Periscope behavior is shared between free demo and August 12, 2026 full release. Campaign adds more weather variety and aircraft awareness in later war — see Pacific Overview — but snap-look doctrine remains.
Related
- Stadimeter Range Guide
- Getting Started
- Map Tools
- Hydrophone Tracking — before the scope goes up.
- Attack Checklist — periscope ticks.
Snap-look doctrine
A good Silent Shark skipper treats the periscope like a camera shutter. Rise to periscope depth on a planned course, steady the boat, raise, acquire, classify, measure, and lower. If you missed the mast top, do not linger — drop, correct depth or heading, and try again. Lingering is how escorts build a datum on your feather.
Practice snap looks in the Basic Tutorial until the muscle memory is boring. Then apply the same habit in night and rain scenarios where acquisition takes longer. Longer acquisition is still not an excuse for continuous exposure.
Angle-on-bow without mythology
AoB estimation is a common confusion between Basic and Advanced tutorials. Pick one consistent geometric method and stick to it: relate your line of sight to the target’s heading using chart tools when possible, then confirm visually. If tutorial text seems reversed, trust the chart geometry and write the number into the TDC carefully. Inconsistent AoB methods produce confident wrong solutions.
Identification under pressure
Class identification unlocks mast height for the stadimeter. Wrong class means wrong range, which means a clean miss even with perfect speed. When visibility is poor, close carefully on the chart before demanding a perfect ID at extreme range. The periscope cannot invent clarity the sea state refuses to give.
Coordination with stations
Use keyboard and mouse controls to jump between chart, hydrophone, periscope, and TDC without losing the plot. The stations overview explains why order matters: listen and plot before you look; look before you flood.
After the shot
Once torpedoes are away, the periscope’s job is usually over. Lower it, change depth with a plan from thermal diving, and execute egress. Curiosity peeks after a hit are a classic way to turn a successful attack into a depth-charge problem.
Frequently Asked Questions
Quick answers to the most common Silent Shark questions.
How long should I keep the periscope up in Silent Shark?
Only long enough for ID, stadimeter alignment, and AoB read — often a few seconds per look. Extended exposure attracts escorts in convoy scenarios.
What zoom should I use for stadimeter range?
6× is typical for mast-top alignment once class is known. Use 1.5× first if you need to find the contact in frame.
Does the periscope work the same in the demo and full game?
Yes. Zoom levels, ID requirements, and exposure risk model are shared. Campaign weather variety may increase difficult ID conditions.